Header

Author Archives: Caroline

Birds

April 4th, 2015 | Posted by Caroline in Illustration - (0 Comments)

Year after year I keep coming back to drawing birds. I guess you always will carry some things with you through life. birdiebirdbird bird_fat

DIY: Hand Painted Easter Eggs

March 26th, 2015 | Posted by Caroline in DIY tutorials | Illustration - (0 Comments)


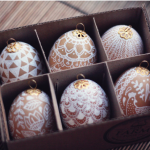
This year’s edition of my easter eggs. What do you think? : )

– – – – – – – – – – – – – – – – – – –

Okay, I think I need to clarify how these eggs where made. Some of you seem to think that I painted white eggs and layered some sort of gold paint etc.  But it’s SO much easier than that! Brown eggs, white posca marker (pen with acrylic ink), DONE! Thank you for the kind comments and emails! Love you, xx


easter-eggs-hand-drawn-brown-white-doodle

Zen doodle meditation

February 22nd, 2015 | Posted by Caroline in Illustration - (0 Comments)

This is SO meditative, it makes me calm and relaxed and in the moment. Well isn’t that cheesy, you say? No, not at all 🙂


dream_illustration_drawing_line_art_black_white_meditation

Color Palette: Afternoon Walk

February 4th, 2015 | Posted by Caroline in Color Palettes - (0 Comments)


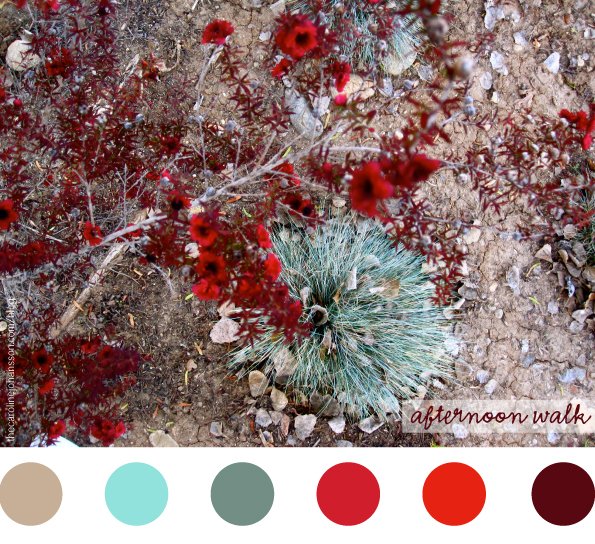
What do you think of this red/mint color palette? I like it quite a bit actually, thinking it would work well for an illustration I have in mind.

color_palettes_afternoon_walk_red_mint_green

DIY: Painted Polymer Clay Figures

January 11th, 2015 | Posted by Caroline in DIY tutorials - (0 Comments)

diy-tutorial-painted-polymer-clay-girls

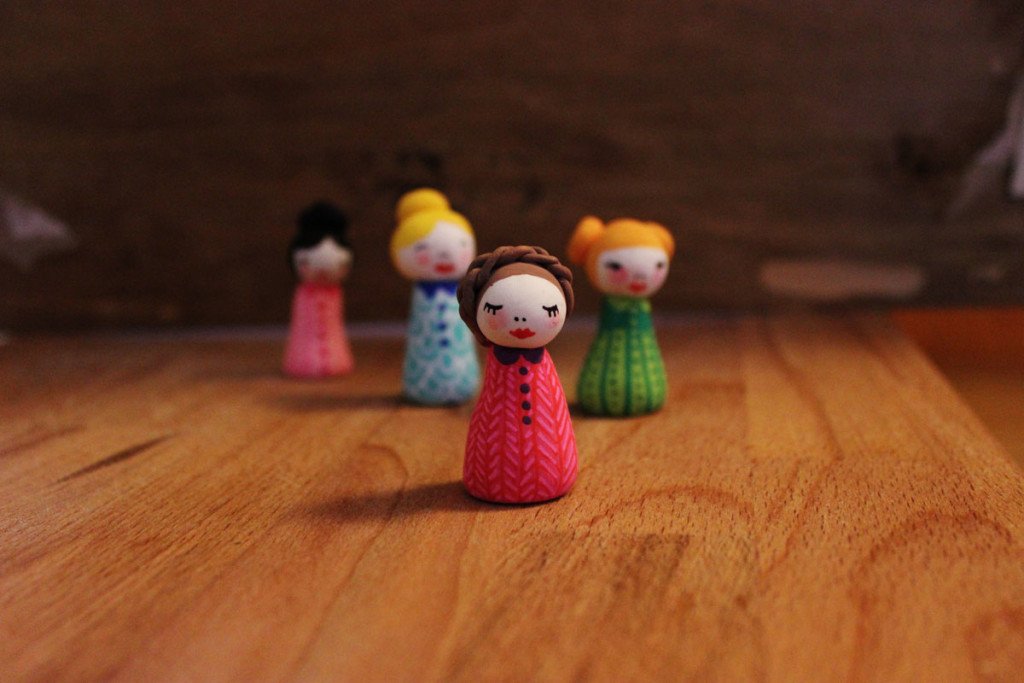
I had some polymer clay laying around so I made these little girls this morning. I’m sure just any clay would do, whatever you might have laying around in the house.

1-painted-fimo-clay-girls

Polymer clay can be found in pretty much any craft store.

2-painted-fimo-clay-girls

painted-polymer-clay-girls-diy

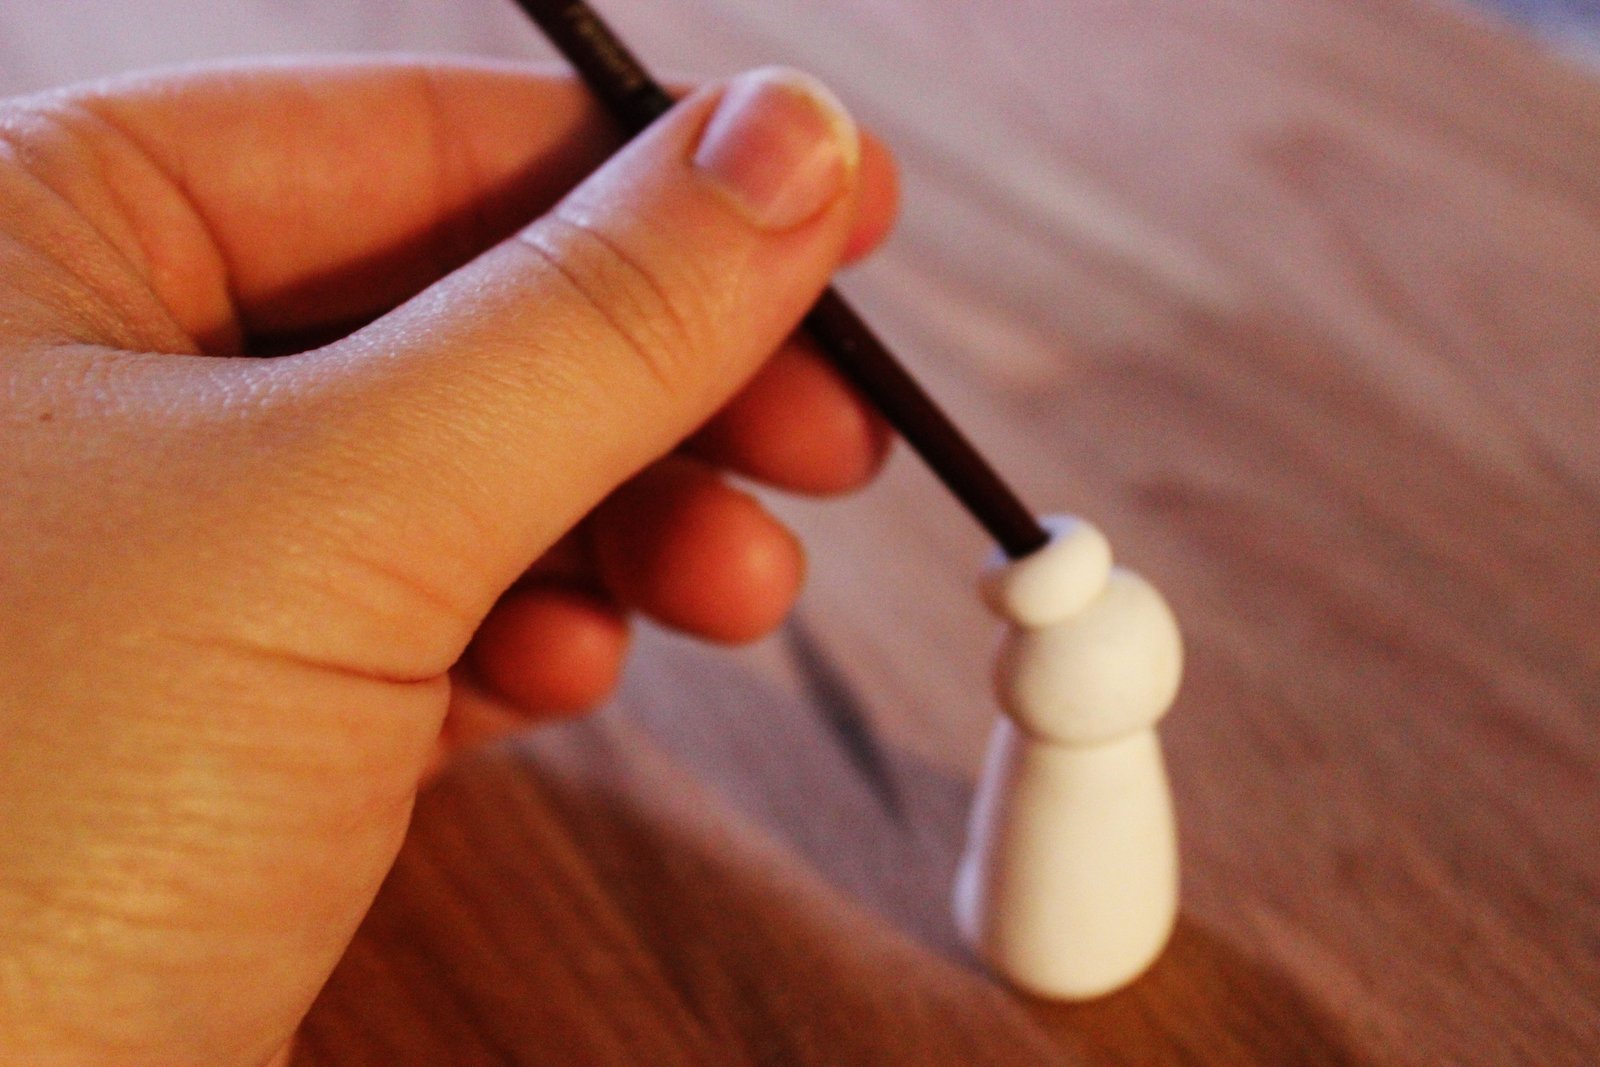
You are going to need three different pieces, and no other tools necessary than your two hands. Don´t worry about size, you can play around with this until you find the proportions you like.

4-painted-fimo-clay-girls

I used the back of a brush for  the hair on this one.
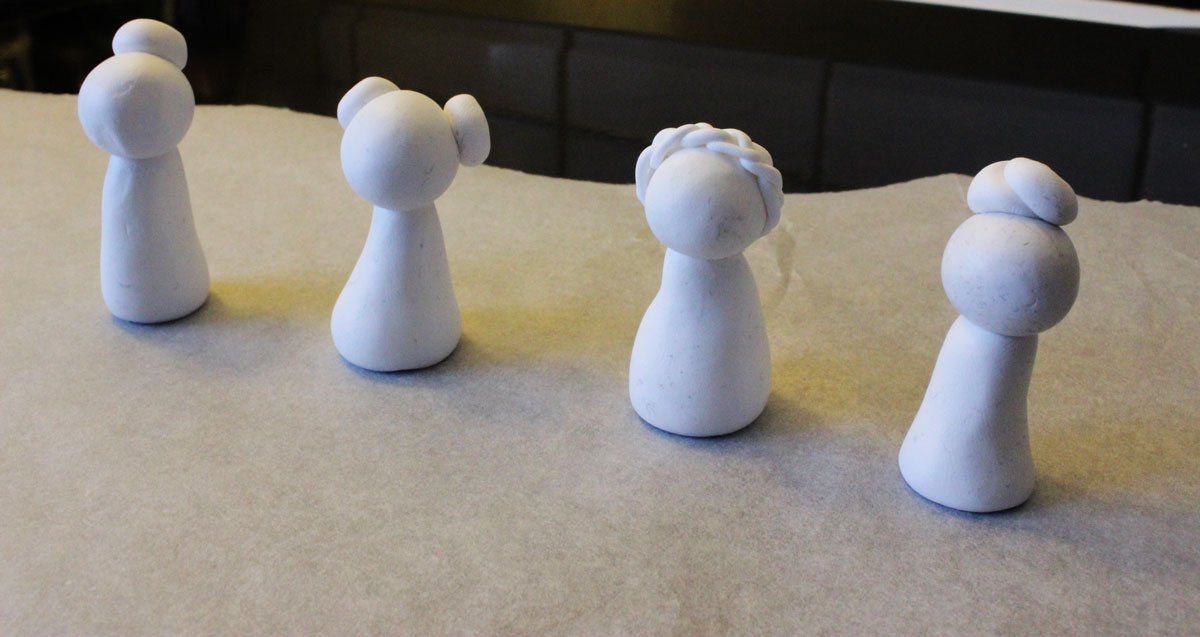
6-painted-polymer-clay-girls

Play around with different “haircuts” until you’re happy.

7-painted-polymer-clay-girls

Once you are done it is time to bake these little ones. Make sure to read the description. Mine said 215°F (100°C) for 30 minutes. Let figures cool completely before touching.

polymer-clay-girls-diy-tutorial

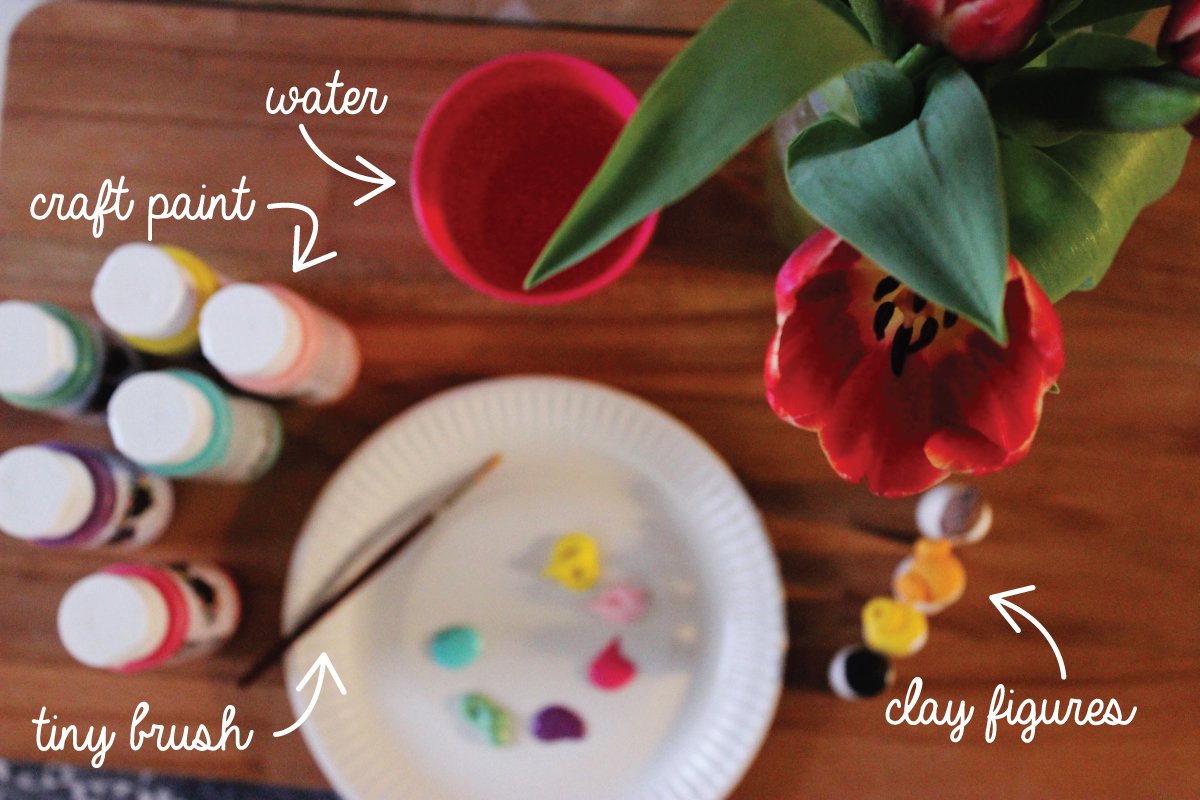
Here comes the FUN part! You are going to need craft paint, water, a small brush and your clay figures.

9-polymer-clay-girls-hair

I started out with the hair.

IMG_1859

And then the base for the dresses.

IMG_1864

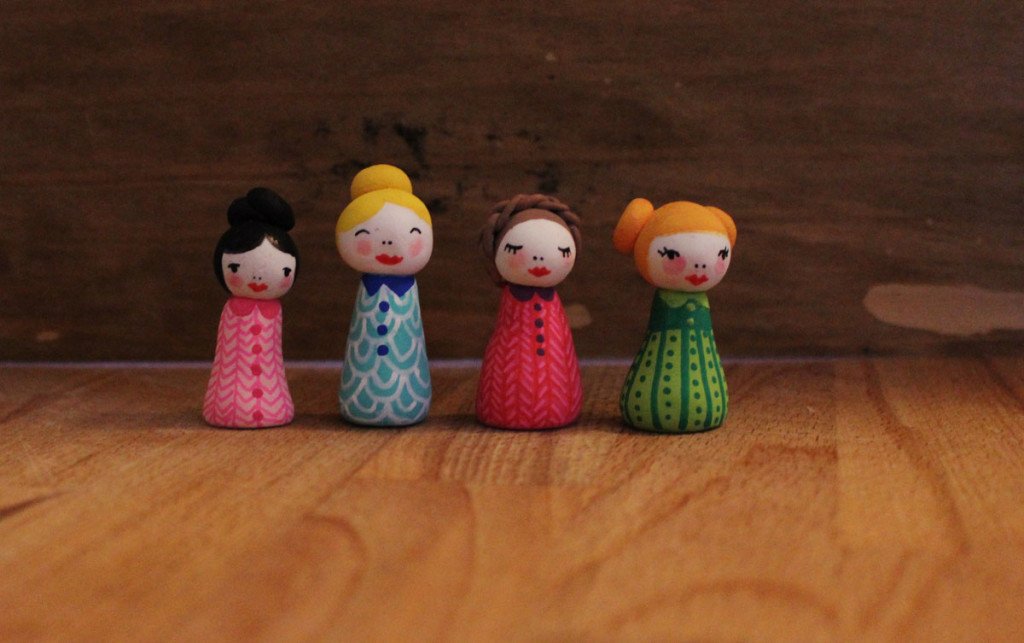
Done! I also finished with one coat of matt varnish, just to make their lives a little longer.

IMG_1866IMG_1867  IMG_1878IMG_1872

Illustration Friday: Invention

January 9th, 2015 | Posted by Caroline in Illustration Friday - (0 Comments)

FullSizeRender

Welcome!

January 6th, 2015 | Posted by Caroline in Illustration - (2 Comments)

carolinealfreds-welcome-caroline  carolinealfreds-king-bear-illustration carolinealfreds-welcome-reindeer-ruth-illustrationcarolinealfreds-welcome-back

Plants and Pots

January 5th, 2015 | Posted by Caroline in One Illustration a Day 2015 - (0 Comments)

IMG_7889

Weird beard

January 4th, 2015 | Posted by Caroline in One Illustration a Day 2015 - (0 Comments)

IMG_7879

Rudolph

January 3rd, 2015 | Posted by Caroline in One Illustration a Day 2015 - (0 Comments)

IMG_7837