Header

This is a really quick, easy and cute DIY gift to fancy-up your host/hostess gifts, perfect for Thanksgiving. Just print and cut, it really is that easy. Click below to download the PDF. I recommend printing it on a heavier cardstock. Hope you enjoy! 

Thanksgiving-Wine-Tags-free-printable-DIY

free-printable-wine-tags-3

Cut out the tags, regular scissors will do the job. Make sure you get all the white out.

free-printable-wine-tags-1Time to cut out the holes, I have a little trick to share below.


free-printable-wine-tags-13This might be just too basic, but YES, there was a time when I would almost injure myself not knowing this trick… Make a hole with a single hole punch BEFORE cutting out the hole with scissors. Trust me on this.

free-printable-wine-tags-12Almost done 🙂 Try them on your wine bottle to see approximately where to fold the tags.

free-printable-wine-tags-2Using a ruler (or just something straight) slightly bend the tag to make a fold. Don’t fold it all the way over, the paper fibers and color might break, and make an ugly fold.

free-printable-wine-tags-11
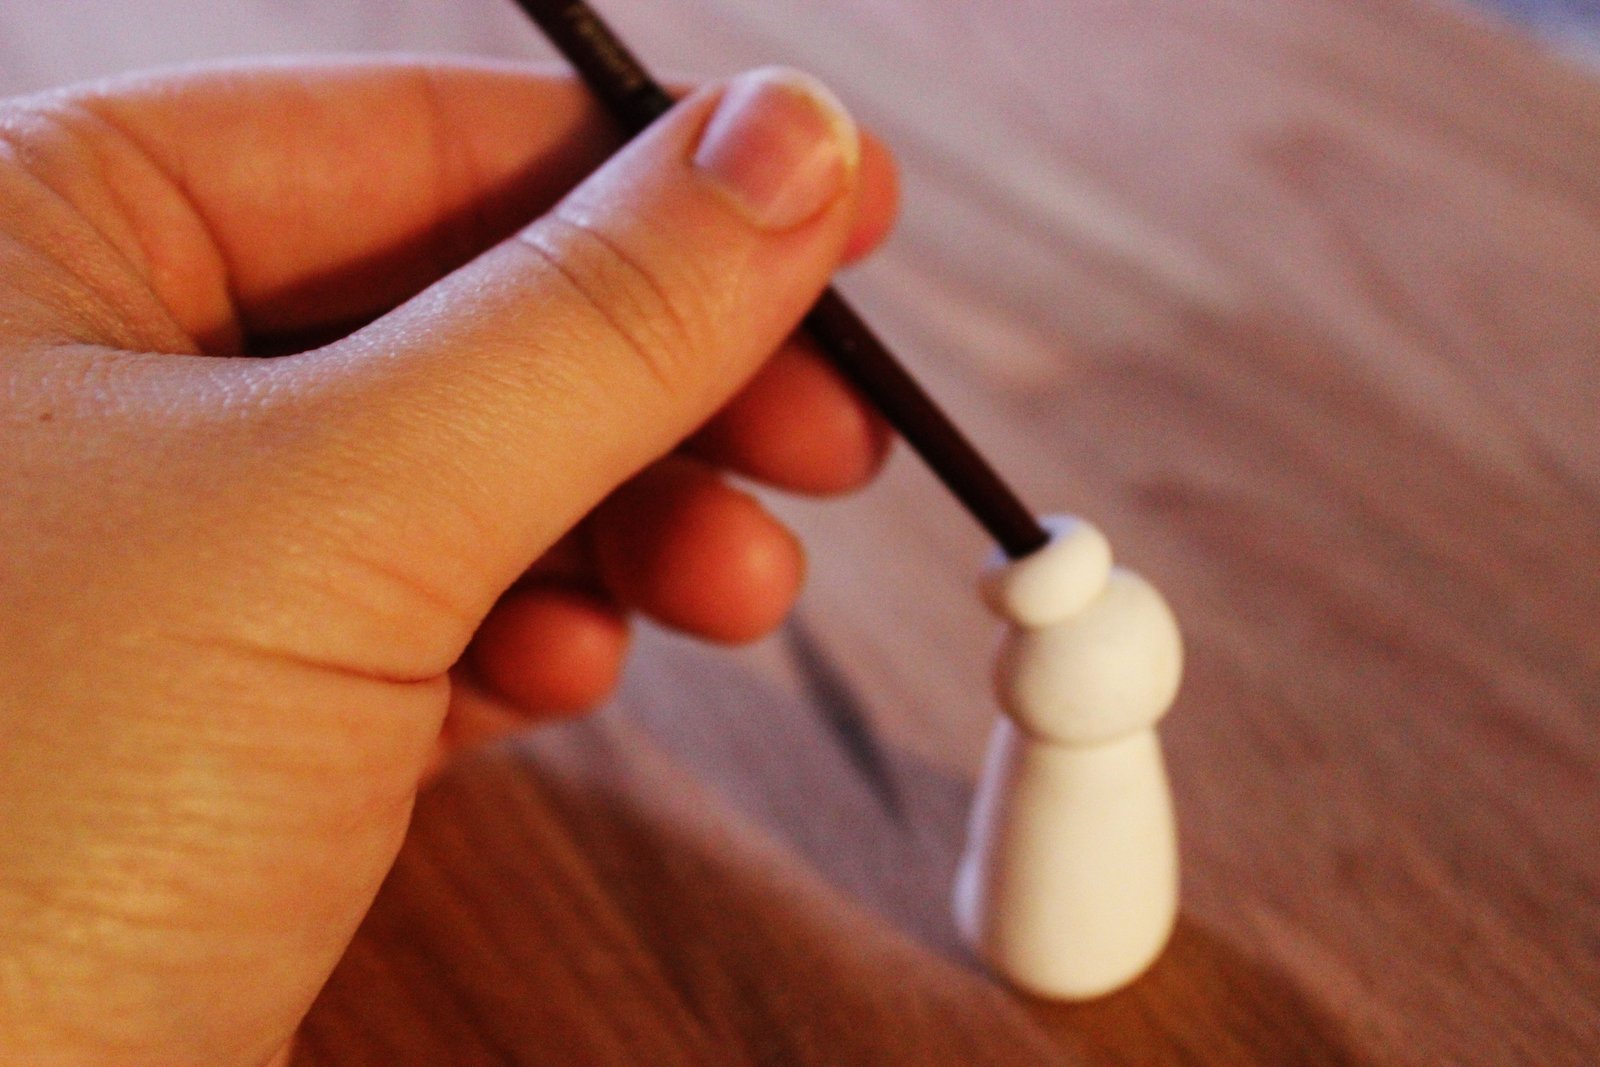
If you want to personalize your gift further you can add name tags. I folded paper in two, wrote the names and cut it for these super-fast name tags. Make holes and add string or ribbon of your choice.

free-printable-wine-tags-4
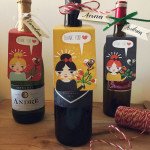
And we are DONE! Simple as that, personal and cute gift for the hostess with the mostest! Hope you enjoy.

free-printable-wine-tags-10

illustrated-download-icon


Hand painted owl rocks

November 12th, 2015 | Posted by Caroline in DIY tutorials | Painted rocks - (0 Comments)

Something I used to do (A LOT) on my previous blog was to paint/draw on rocks. Especially owls, but also some other objects, like fishes, feathers and also lace/doily patterns. I think part of the reason I quit was just it was very hard for me to find the rocks to paint on in Stockholm. Now that we relocated to LA I seem to find a lot more of them for some reason, especially on my morning walks. So this might just be something I will pick up and do again. For now, here is some inspiration from all the rocks I painted way back when…


doodled-rocks-owl painted-owl-rocks-12 painted-rocks-lace-doily-pattern-1 painted-owl-rocks-11 painted-rocks-fish painted-owl-rocks-10 painted-owl-rocks-9 painted-owl-rocks-8 painted-owl-rocks-7 painted-owl-rocks-6 painted-rocks-lace-doily-pattern painted-owl-rocks-5


So there is no step by step photos for how to do this, but basically:

  1. Go for a walk and look for rocks. A beach with those soft, round beach pebbles would work great. But don’t worry, I found these from walking around in my neighborhood here in LA, no need to look far in other words.
  2. Rinse of any dirt with water, we don’t want to ruin those pens of yours. Let dry.
  3. I prefer to use Posca Markers, but any kind of acrylic paint (either brush or pen) should do. Get creative!
  4. Once you are happy with your designs, let them dry and cover with the gloss of your choice, matte/glossy.
  5. You are done! Perfect for decorating windows, the garden, pots… Or put them in a nice box and give to a dear friend.

diy-hand-painted-owl-rocks

IMG_0538 IMG_0539


This year’s edition of my easter eggs. What do you think? : )

– – – – – – – – – – – – – – – – – – –

Okay, I think I need to clarify how these eggs where made. Some of you seem to think that I painted white eggs and layered some sort of gold paint etc.  But it’s SO much easier than that! Brown eggs, white posca marker (pen with acrylic ink), DONE! Thank you for the kind comments and emails! Love you, xx


easter-eggs-hand-drawn-brown-white-doodle

DIY: Painted Polymer Clay Figures

January 11th, 2015 | Posted by Caroline in DIY tutorials - (0 Comments)

diy-tutorial-painted-polymer-clay-girls

I had some polymer clay laying around so I made these little girls this morning. I’m sure just any clay would do, whatever you might have laying around in the house.

1-painted-fimo-clay-girls

Polymer clay can be found in pretty much any craft store.

2-painted-fimo-clay-girls

painted-polymer-clay-girls-diy

You are going to need three different pieces, and no other tools necessary than your two hands. Don´t worry about size, you can play around with this until you find the proportions you like.

4-painted-fimo-clay-girls

I used the back of a brush for  the hair on this one.

6-painted-polymer-clay-girls

Play around with different “haircuts” until you’re happy.

7-painted-polymer-clay-girls

Once you are done it is time to bake these little ones. Make sure to read the description. Mine said 215°F (100°C) for 30 minutes. Let figures cool completely before touching.

polymer-clay-girls-diy-tutorial

Here comes the FUN part! You are going to need craft paint, water, a small brush and your clay figures.

9-polymer-clay-girls-hair

I started out with the hair.

IMG_1859

And then the base for the dresses.

IMG_1864

Done! I also finished with one coat of matt varnish, just to make their lives a little longer.

IMG_1866IMG_1867  IMG_1878IMG_1872